// // Button groups // -------------------------------------------------- // Make the div behave like a button .btn-group, .btn-group-vertical { position: relative; display: inline-block; vertical-align: middle; // match .btn alignment given font-size hack above > .btn { position: relative; float: left; // Bring the "active" button to the front &:hover, &:focus, &:active, &.active { z-index: 2; } &:focus { // Remove focus outline when dropdown JS adds it after closing the menu outline: 0; } } } // Prevent double borders when buttons are next to each other .btn-group { .btn + .btn, .btn + .btn-group, .btn-group + .btn, .btn-group + .btn-group { margin-left: -1px; } } // Optional: Group multiple button groups together for a toolbar .btn-toolbar { margin-left: -5px; // Offset the first child's margin &:extend(.clearfix all); .btn-group, .input-group { float: left; } > .btn, > .btn-group, > .input-group { margin-left: 5px; } } .btn-group > .btn:not(:first-child):not(:last-child):not(.dropdown-toggle) { border-radius: 0; } // Set corners individual because sometimes a single button can be in a .btn-group and we need :first-child and :last-child to both match .btn-group > .btn:first-child { margin-left: 0; &:not(:last-child):not(.dropdown-toggle) { .border-right-radius(0); } } // Need .dropdown-toggle since :last-child doesn't apply given a .dropdown-menu immediately after it .btn-group > .btn:last-child:not(:first-child), .btn-group > .dropdown-toggle:not(:first-child) { .border-left-radius(0); } // Custom edits for including btn-groups within btn-groups (useful for including dropdown buttons within a btn-group) .btn-group > .btn-group { float: left; } .btn-group > .btn-group:not(:first-child):not(:last-child) > .btn { border-radius: 0; } .btn-group > .btn-group:first-child { > .btn:last-child, > .dropdown-toggle { .border-right-radius(0); } } .btn-group > .btn-group:last-child > .btn:first-child { .border-left-radius(0); } // On active and open, don't show outline .btn-group .dropdown-toggle:active, .btn-group.open .dropdown-toggle { outline: 0; } // Sizing // // Remix the default button sizing classes into new ones for easier manipulation. .btn-group-xs > .btn { &:extend(.btn-xs); } .btn-group-sm > .btn { &:extend(.btn-sm); } .btn-group-lg > .btn { &:extend(.btn-lg); } // Split button dropdowns // ---------------------- // Give the line between buttons some depth .btn-group > .btn + .dropdown-toggle { padding-left: 8px; padding-right: 8px; } .btn-group > .btn-lg + .dropdown-toggle { padding-left: 12px; padding-right: 12px; } // The clickable button for toggling the menu // Remove the gradient and set the same inset shadow as the :active state .btn-group.open .dropdown-toggle { .box-shadow(inset 0 3px 5px rgba(0,0,0,.125)); // Show no shadow for `.btn-link` since it has no other button styles. &.btn-link { .box-shadow(none); } } // Reposition the caret .btn .caret { margin-left: 0; } // Carets in other button sizes .btn-lg .caret { border-width: @caret-width-large @caret-width-large 0; border-bottom-width: 0; } // Upside down carets for .dropup .dropup .btn-lg .caret { border-width: 0 @caret-width-large @caret-width-large; } // Vertical button groups // ---------------------- .btn-group-vertical { > .btn, > .btn-group, > .btn-group > .btn { display: block; float: none; width: 100%; max-width: 100%; } // Clear floats so dropdown menus can be properly placed > .btn-group { &:extend(.clearfix all); > .btn { float: none; } } > .btn + .btn, > .btn + .btn-group, > .btn-group + .btn, > .btn-group + .btn-group { margin-top: -1px; margin-left: 0; } } .btn-group-vertical > .btn { &:not(:first-child):not(:last-child) { border-radius: 0; } &:first-child:not(:last-child) { border-top-right-radius: @border-radius-base; .border-bottom-radius(0); } &:last-child:not(:first-child) { border-bottom-left-radius: @border-radius-base; .border-top-radius(0); } } .btn-group-vertical > .btn-group:not(:first-child):not(:last-child) > .btn { border-radius: 0; } .btn-group-vertical > .btn-group:first-child:not(:last-child) { > .btn:last-child, > .dropdown-toggle { .border-bottom-radius(0); } } .btn-group-vertical > .btn-group:last-child:not(:first-child) > .btn:first-child { .border-top-radius(0); } // Justified button groups // ---------------------- .btn-group-justified { display: table; width: 100%; table-layout: fixed; border-collapse: separate; > .btn, > .btn-group { float: none; display: table-cell; width: 1%; } > .btn-group .btn { width: 100%; } > .btn-group .dropdown-menu { left: auto; } } // Checkbox and radio options // // In order to support the browser's form validation feedback, powered by the // `required` attribute, we have to "hide" the inputs via `opacity`. We cannot // use `display: none;` or `visibility: hidden;` as that also hides the popover. // This way, we ensure a DOM element is visible to position the popover from. // // See https://github.com/twbs/bootstrap/pull/12794 for more. [data-toggle="buttons"] > .btn > input[type="radio"], [data-toggle="buttons"] > .btn > input[type="checkbox"] { position: absolute; z-index: -1; .opacity(0); } .elementor-animation-grow-rotate { transition-duration: 0.3s; transition-property: transform; } .elementor-animation-grow-rotate:active, .elementor-animation-grow-rotate:focus, .elementor-animation-grow-rotate:hover { transform: scale(1.1) rotate(4deg); } Ultimate Guide to Free Instagram Repost Share Content Effortlessly – Smart Porteria Virtual

Ultimate Guide to Free Instagram Repost Share Content Effortlessly

If you’re looking for an effective method to share incredible content on your Instagram, you’re in the right place. Utilizing a free instagram repost tool can greatly simplify the process and enhance your engagement. This guide will take you through everything you need to know about reposting on Instagram successfully.

Why Repost on Instagram?

Instagram is a platform rich with user-generated content, showcasing stunning photographs, informative videos, and engaging stories. Reposting not only allows you to curate great content but also helps you grow your audience. By sharing posts from other users, you foster a sense of community and collaboration, which can lead to increased visibility and interaction on your profile. Furthermore, reposting helps you connect with the original creators, potentially opening doors for collaborations in the future.

Understanding Instagram’s Policies

Before diving into the reposting process, it’s crucial to understand Instagram’s policies regarding content sharing. While Instagram encourages sharing, you need to be mindful of copyright laws and the need for proper attribution. Always seek permission from the original content creator before reposting their work, and give credit in the caption or through tagging. This respect for creators fosters a positive environment and upholds Instagram’s community guidelines.

How to Repost on Instagram: Step-by-Step Guide

Using a Repost App

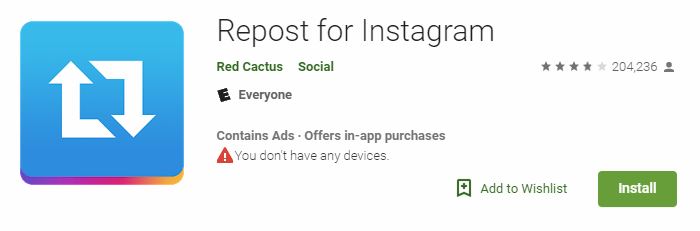
One of the simplest methods to repost on Instagram involves the use of various repost apps available for both Android and iOS. Here’s how to do it:

  1. Download a Repost App: Go to the app store and search for a reputable repost app. Options like «Repost for Instagram» are popular and user-friendly.
  2. Find the Post to Repost: Open Instagram, navigate to the post you want to share, and tap the three dots in the upper right corner of the post.
  3. Select ‘Copy Link’: In the menu that appears, click on ‘Copy Link.’ This action saves the post URL to your clipboard.
  4. Open the Repost App: Launch the repost app you downloaded. The app will automatically detect the copied link and display the post.
  5. Customization: Depending on the app, you may have options to customize the caption or the appearance (like adding attribution). Make your selections.
  6. Repost on Instagram: Hit the repost button, and the app will share the content directly to your Instagram profile.

Manual Reposting

If you prefer not to use a third-party app, you can manually repost content, though this method can be slightly more cumbersome:

  1. Take a Screenshot: Capture a screenshot of the post you wish to share, making sure to include the entire image and any relevant captions.
  2. Edit the Screenshot: Use an editing tool to crop the image neatly and adjust any settings that enhance visual appeal.
  3. Upload to Your Profile: Create a new post on your Instagram and upload the edited screenshot. In the caption, give credit to the original creator.

Best Practices for Reposting

Now that you know how to repost, here are some best practices to consider:

  • Choose Quality Content: Share posts that resonate with your brand or your personal aesthetic. Evaluate whether the content aligns with your audience’s interests.
  • Timing is Key: Repost during peak engagement times when your audience is most active. This increases the likelihood of your post being seen and shared.
  • Engage with the Original Creator: Once you repost, tag the original creator and perhaps comment on their post. This outreach can build relationships and encourage reciprocal sharing.
  • Mix Up Your Content: Effective reposting also involves a balanced mix of your own original content and reposted materials. Ensure your profile showcases your personality as well as curated posts.
  • Utilize Hashtags: Include relevant hashtags in your repost captions. This strategy will help reach a broader audience.

Tools to Enhance Your Reposting Strategy

Beyond reposting apps, several tools can enhance your Instagram strategy:

  • Canva: Utilize Canva to create compelling graphics and visual content that complements the repost, giving your profile a professional touch.
  • Later: Use planning tools like Later to schedule reposted content, ensuring consistent engagement on your profile.
  • Instagram Insights: Leverage Instagram analytics to monitor insights and engagement metrics on your reposted content. This feedback can help you refine your strategy.

The Importance of Community Engagement

Reposting is not just about content sharing; it’s also about building a community. Engaging with your followers and the content creators you repost can create a buzz around your profile. Be proactive in responding to comments, liking their posts, and even exploring collaborations. This engagement fosters loyalty and increases the chances that followers will interact with your future content.

Conclusion

Reposting on Instagram can significantly elevate your content strategy and foster a sense of community. By respecting original creators, utilizing repost apps, and adhering to best practices, you can share valuable content while enhancing your own engagement. Start integrating reposting into your strategy today and watch your Instagram presence flourish!

Scroll al inicio